How to Naturally Clean an Oven
If you search online for how to naturally clean an oven, almost every guide tells you the exact same thing: mix baking soda and white vinegar into a bubbling paste.
It looks satisfying on camera, but chemically, it is a complete waste of time.
When you combine an alkaline base (baking soda) with an acid (vinegar), you trigger a brief fizzing reaction that produces carbon dioxide gas, water, and a weak salt residue. In doing so, you neutralize the very grease-cutting properties you need.
To dissolve years of baked-on fat, carbonized sugar, and grease without toxic fumes or scratched enamel, you need real alkaline power, adequate dwell time, and the right technique. Here is the step-by-step method I use to naturally restore even the most neglected ovens without damaging sensitive electrical components.
The Chemistry Behind Truly Natural Oven Cleaning
Baked-on oven grime consists primarily of polymerized fats and carbonized organic matter. Acids like vinegar cannot break down heavy fat. Instead, you need a high-pH alkaline solution to trigger saponification—a chemical process that turns stubborn, baked-on grease into a water-soluble soap that easily wipes away.
While standard baking soda (sodium bicarbonate) has a mild pH of around 8 to 9, supplementing or replacing it with washing soda (sodium carbonate) or oxygen bleach (sodium percarbonate) pushes the pH closer to 11. This alkaline boost gives you heavy-duty grease-cutting power without releasing caustic chemical fumes into your home.
Ingredients and Tools You Will Need
- 1 cup baking soda
- 1/3 cup washing soda (or sodium percarbonate oxygen bleach)
- Warm water (enough to form a thick, spreadable paste)
- Plastic wrap (essential for locking in moisture during deep cleans)
- Non-scratch tools: silicone spatula, nylon scrubbing sponge, and microfiber cloths
- Single-edge flat razor blade (for tough spots on glass)
- Wire coat hanger and rubber bands (for dual-pane glass vents)
- Dish soap (for wire racks)
Step-by-Step: The High-Alkaline Deep Cleaning Protocol
Applying your paste properly and protecting delicate internal parts is critical. A messy application can easily damage internal electronics, requiring professional service or local oven repair in Caldwell, ID to replace burned-out sensors or igniters.
1. Protect Critical Oven Components
Before applying any cleaning paste, take a close look at your oven’s interior and make sure you avoid the following areas:
- Heating Elements: Keep all moisture and paste completely off both the upper broil and lower bake heating coils.
- Spark Igniters and Gas Ports: On gas ovens, never get paste near the pilot assembly or the igniter.
- Temperature Sensor Bulb: Avoid bumping or coating the thin metal probe located on the back wall.
- Door Gasket Seal: The fiberglass or rubber seal around the oven opening is fragile; harsh rubbing or moisture degrades the material and causes heat leaks.
2. Apply the Paste and Lock in Moisture
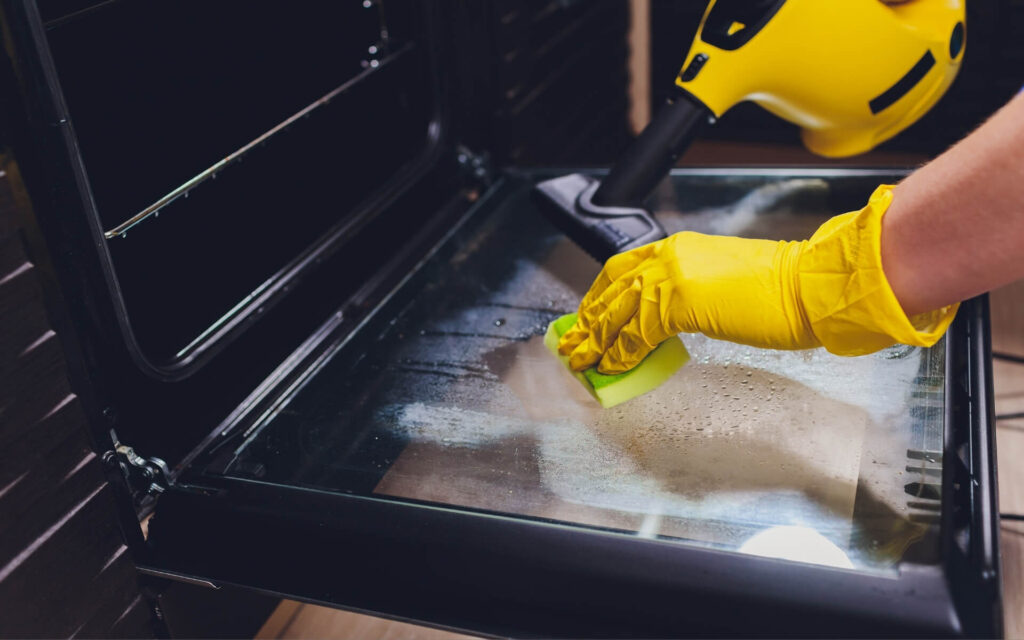
Mix your baking soda, washing soda, and warm water until it reaches a consistency similar to Greek yogurt. Using gloved hands or a silicone spatula, spread a thick, even layer over the interior enamel walls, side panels, and bottom floor.
For severe buildup, press sheets of plastic wrap directly against the pasted walls. This prevents the mixture from drying out, allowing the alkaline chemistry to actively break down baked-on fats for the entire duration.
3. Let Dwell Time Do the Heavy Lifting
Leave the paste on the oven interior for 8 to 12 hours (or up to 16 hours for extreme carbon buildup). Do not rush this step. Dwell time is what turns hardened carbon into a soft, wipeable sludge.
4. Scrape and Wipe Clean
Once the dwell time is complete, peel away the plastic wrap. Use a flexible silicone spatula to gently scrape the softened sludge into a dustpan or trash bag. Follow up with a damp microfiber cloth or a soft nylon sponge, rinsing frequently with clean, warm water until no powdery residue remains.
How to Clean Cloudy Glass Doors and Charred Wire Racks
The glass door and steel wire racks require specialized care to ensure you do not scratch the glass or ruin the chrome finish.
Restoring the Oven Glass (Inside and Between Panes)
Oven door glass can turn cloudy after years of heat-bonded grease accumulation.
- The Inner Glass Pane: Apply a baking soda and water paste directly to the glass and let it sit for 20 minutes. Wipe it away with a damp microfiber cloth. For stubborn, pinpoint carbon specks, hold a flat razor blade at a strict 45-degree angle and gently scrape them away without scratching the tempered glass.
- Between Dual Panes: If dust, drips, or haze have settled between the two sheets of glass, you do not need to dismantle the door. Take a straight wire hanger, wrap a damp microfiber cloth securely around one end with a rubber band, and slide it up through the ventilation slots at the bottom of the door to wipe the interior surfaces clean.
Soaking and Reviving Wire Racks
Never scrub metal racks inside the oven cavity, as this can scratch the enamel liner.
- Line your bathtub or a large utility sink with old towels to prevent scratches.
- Lay the wire racks flat on top of the towels.
- Fill the tub with very hot water until the racks are fully submerged.
- Stir in 1/2 cup of washing soda and 1/4 cup of liquid dish soap.
- Let the racks soak for 6 to 12 hours. The carbonized grease will soften, allowing you to wipe the metal clean with a non-scratch pad with minimal effort.
Case Study: Tackling Four Years of Neglect
A property manager recently reached out regarding a rental unit with an oven coated in four years of baked-on sugar, drippings, and heavy grease. The previous tenants had attempted to clean it with harsh commercial aerosol sprays and steel wool, which failed to remove the thick crust and left behind scratched enamel and lingering chemical fumes.
Instead of replacing the appliance, we tackled it using this high-alkaline method:
- We coated the entire interior in a thick paste of washing soda and baking soda, carefully steering clear of the heating coils and the door gasket.
- We covered every surface with plastic wrap to lock in moisture and allowed it to sit undisturbed for 16 hours.
- After the soak, the rock-hard carbon crust had transformed into a soft gel that peeled away cleanly with a silicone spatula.
- We used the cloth-wrapped wire wand to clear away streaks trapped between the door panes via the bottom air vents.
- The racks soaked overnight in a tub of hot water and washing soda, emerging in like-new condition.
The entire unit was restored to pristine condition without toxic chemicals, scratches, or permanent damage to the heating circuits.
Preventative Maintenance and Costly Mistakes to Avoid
The easiest way to clean an oven is to prevent stubborn grease from baking into the enamel in the first place.
- Catch Drips Early: Place a standard rimmed baking sheet on the lowest wire rack beneath pies, casseroles, or roasts. Never place aluminum foil directly on the bottom enamel floor of your oven, as high heat can cause the foil to melt permanently into the porcelain finish.
- Use the Salt Trick for Fresh Spills: If food bubbles over while you are cooking, immediately sprinkle a generous handful of table salt over the hot spill. The salt absorbs the liquid grease and forms a crust that sweeps right out once the oven cools down.
- Use Steam Softening: After baking, place an oven-safe bowl filled with water inside the warm oven and close the door for 20 minutes. The trapped steam loosens fresh splatters so a quick wipe with a microfiber cloth finishes the job.
- Skip the High-Heat Self-Clean Cycle: The built-in self-cleaning cycle runs at temperatures approaching 900 degrees Fahrenheit. This extreme thermal stress frequently burns out thermal fuses, damages electronic control boards, warps wire racks, and degrades door gaskets. If your oven ever stops heating after a self-clean cycle or suffers an electrical failure, reaching out for qualified oven repair in Caldwell, ID will get your heating elements and controls running safely again.