One of the best things about having a modern refrigerator is that you can always get clean, fresh drinking water. You depend on your fridge to give you clean, delicious-tasting water, whether you’re filling up a tall glass on a hot summer day or getting ice cubes for a cold drink. But that ease of use comes with a small amount of upkeep. Over time, your refrigerator water filter collects a lot of dirt, chlorine, and other harmful substances. It eventually gets clogged and stops working well.
If you’ve observed a metallic taste in your water or a significant reduction in the flow from the dispenser, it’s time to replace it. Many homeowners are afraid to mess with their appliances, and instead of trying a simple DIY fix, they rush to find an expert. Some problems are too complicated for anyone but a professional to fix, but changing your water filter is something that anyone can do in just a few minutes.
This complete guide will show you how to do everything step by step. We’ll talk about how to find the right filter for your model, how to install it without making a mess, and how to resolve common problems. You will know how to keep your family’s drinking water perfectly clean and fresh by the end of this article.
Why You Need to Replace Your Water Filter Regularly
Before we get into the physical steps of changing the unit, it’s important to know why this routine maintenance is crucial. The water filter in your fridge is not just a piece of plastic that sits there; it is an active defense system that keeps you and your appliance safe.
Better Taste and Odor
The taste and smell of your water changing is the most obvious sign that your filter is no longer working. Chlorine is often found in tap water because cities use it to kill bacteria. It is safe, but it can leave a chemical taste in your mouth. A new filter uses activated carbon to soak up these unpleasant smells and tastes. When the carbon is fully saturated, the undesirable tastes go right through the glass.
Removing Harmful Contaminants
A good filter does more than just improve your water taste. It also gets rid of tiny particles that you can’t see or smell. Heavy metals like lead and mercury, cysts, asbestos, and several volatile organic compounds are all part of the process. If you leave a filter alone for too long, you are actively eating these particles. This Whirlpool guide on how to change refrigerator water filters has additional information on how different filtration systems keep your family safe.
Protecting Your Refrigerator’s Internal Systems
A heavily clogged filter forces the pump inside your refrigerator to exert more effort to push water through the dense carbon block. This extra stress can make your appliance wear out faster over time. In the worst case, a completely blocked filter can cause pressure to build up inside, which can crack housings and cause leaks that cost a lot of money. If you ever have to deal with a big leak or a broken internal line, the best way to get things running smoothly again is to look for trustworthy washing machine or refrigerator repair people in your area.
How Often Should You Change Your Filter?
Most appliance makers say that you should change the water filter in your refrigerator every six months. However, this is not a strict guideline. How often you need to replace your water filter depends a lot on how much water your family uses and how good the tap water is in your area.
You might need to replace yours every four months if you have a big family that drinks a lot of water and uses the ice maker all the time. If you live alone and rarely use the dispenser, it may last 8–9 months.
Keep an eye out for these telltale signs that a replacement is overdue:
- The water dispenser flow has become noticeably slower.
- Your ice cubes are smaller than usual or look cloudy.
- The water has a strange, metallic, or chlorine-like taste.
- Your refrigerator’s electronic “change filter” indicator light turns red.
Step-by-Step Guide to Replacing Your Filter

Now that you know how important it is to keep things up to date, let’s get into the actual step-by-step process. Don’t worry; you don’t need any special tools or mechanical skills for this job.
Step 1: Find the Correct Replacement Filter
You can’t just go to a store and pick up any old water filter. Each brand and model of refrigerator has a unique shape and way to connect to other appliances. Check your current filter for a part number to find the exact match for your unit. If you can’t find it, check the model number of your refrigerator. It’s usually on a sticker inside the fresh food compartment.
You can easily order the right replacement online or get one at a nearby hardware store once you have that information. This great article on TCL about fridge maintenance has more specific brand tips on how to find the right match.
Step 2: Locate the Filter in Your Fridge
The filter can be in many different places, depending on how your refrigerator is made. You can usually find it in one of three places:
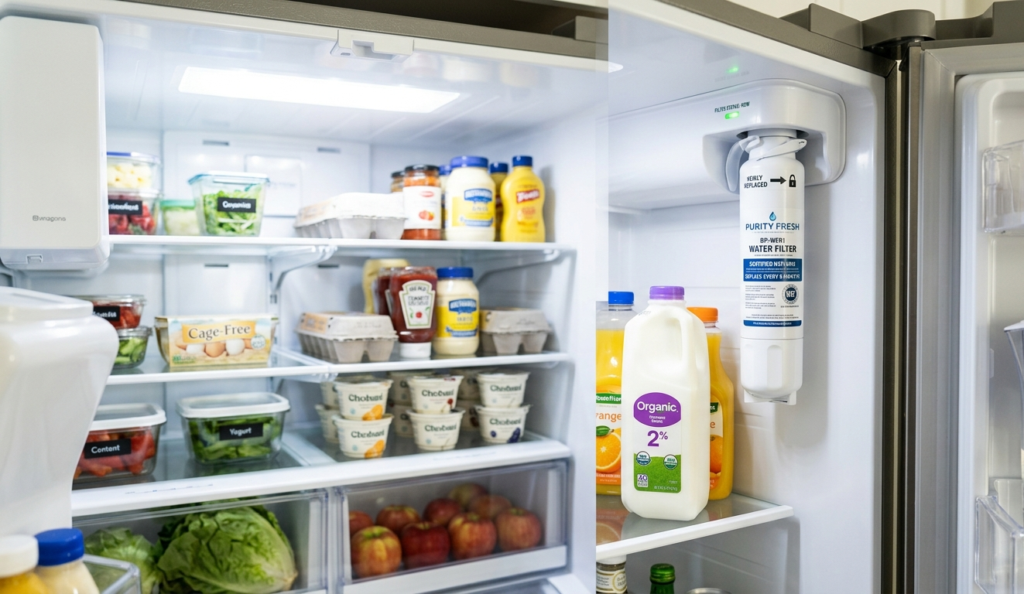
- Inside the upper right corner: This location is very common in French door and side-by-side refrigerators.
- In the bottom grille: Look at the external base of your refrigerator, near the floor. Many older units house the filter there.
- Inside the door: Some modern units hide the filter cartridge inside the thick casing of the left-hand door.
Remove the Old Filter
Please place a small towel directly under the filter area before twisting or pulling anything. During this process, a few drops of water will inevitably spill out. The towel will keep you from having to clean up a puddle later.
There are usually two main ways to remove a filter:
Push Button: If there is a button next to the filter cap, push it in firmly. The filter cartridge should pop out toward you, allowing you to pull it free.
Twist and Pull: If your filter does not have a button, grab the cylinder firmly, twist it a quarter-turn counterclockwise, and pull it straight out.
Step 4: Install the New Filter
Remove the new filter from its sterile packaging and any plastic covers on the O-rings or tip. If your filter needs to be installed with a quarter turn, line up the raised arrow on the filter with the notch on the refrigerator housing. Push it in hard and turn it to the right until it locks into place.
If your fridge has a push-button feature, just slide the new filter in until you hear a clear click. Pull on it gently to make sure it is locked in place and won’t come loose when the water pressure rises.
Step 5: Flush the System
Most homeowners forget to do this step, but it is crucial. There is loose, safe carbon dust in new carbon filters. After you install it, the first glass of water you drink might be dark or cloudy.
To flush the system, fill a big pitcher with water and run it through the dispenser for three to five minutes, or until you’ve dispensed about three gallons of water. This gets rid of all the trapped air and loose carbon, so your drinking water is clear and tastes great.
Step 6: Reset the Indicator Light
Your refrigerator doesn’t really know that you just changed the filter. It runs on a simple timer. You have to tell the computer to reset the countdown clock by hand. Find a button on your fridge’s control panel that says “Filter Reset” or “Water Filter.” Hold down this button for three to five seconds. The warning light should turn green or go out completely.
Troubleshooting Common Filter Issues
Occasionally, unexpected issues arise. Here are some quick fixes for the most common problems that come up during this process.
The Filter is Stuck and Won’t Come Out
Don’t use too much brute force on your filter if it won’t move. You could break the plastic water manifold. The filter is often stuck in place because of the pressure of the water inside. To let the pressure out, try turning off the refrigerator’s main water supply valve and holding down the water dispenser lever for a few seconds. The filter should be much easier to twist or pop out once the pressure is gone.
Water is Leaking from the New Filter
If you see a drip after putting the filter in, take it out right away and look at the rubber O-rings at the end. When you put these little rubber rings in, they can sometimes get bunched up or torn. Ensure that the O-rings are properly seated in their grooves. Putting a small amount of vegetable oil on the O-rings can help them slide in easily and make a perfect, watertight seal. If you keep having leaks, you might want to stop looking for “appliance repair near me” and call the experts at All Valley Appliance Repair to check your unit for hairline cracks.
When to Call the Professionals

Changing the water filter is a great DIY project that can save you money, but some appliance problems are too big for a simple home fix. If you’ve changed your filter and flushed the system, but your water still tastes awful, your main water line might be dirty, or your reservoir might be broken.
Furthermore, if your dispenser panel is having electrical problems or you need complicated microwave or washing machine repair, it’s always best to call in trained professionals. If you don’t have the right training, working with high-voltage parts and complicated plumbing systems can cause damage to your property or injury to yourself.
If you ever need help with your home appliances, don’t hesitate to contact our friendly staff here to set up a quick inspection.
FAQ’s
Should I turn off the water before I change the filter?
No, you don’t need to turn off the water for most modern refrigerators. These units have an automatic shut-off valve that stops the water flow as soon as the filter is taken out. But if your filter is stuck because of high pressure, you can safely get it out by turning off the water valve behind the fridge.
Why is my water dispenser sputtering after I changed the filter?
It’s normal for things to sputter. When you take out the old filter, air gets stuck in the water lines. When you flush the system, the air is pushed out of the dispenser, which makes a little noise and sputtering. It will smooth out if you keep running the water for a few gallons.
What happens if I don’t change my refrigerator water filter?
If you don’t change it, the filter will eventually get so full of dirt that it can’t work. This will make the water flow very slowly. More importantly, the activated carbon will no longer be able to trap pollutants, which means that heavy metals, chemicals, and undesirable tastes will go right into your drinking water.
Is it possible to clean and reuse my old water filter?
No, refrigerator water filters can only be used once. The activated carbon inside traps tiny particles deep in its pores. You can’t wash or flush these pollutants out at home. Trying to use an old filter again is dirty and doesn’t work.
The light on my filter didn’t come on. Should I still change it?
Yes. The light is usually just a simple timer that goes off every six months. If your family consumes a significant amount of water, your filter may become clogged and wear out well before the timer signals its expiration. If the water tastes bad or flows slowly, always trust your senses and change it.